Starting a family can feel like a big adventure, especially if you’re considering in vitro fertilization (IVF). Whether you’re just curious or ready to take the leap, knowing the IVF timeline can make the process less overwhelming. It’s like having a map for a road trip—you might not know every twist and turn, but you’ll feel more prepared for what’s ahead. In this guide, we’ll walk you through every step of the IVF journey, from the first appointment to the moment you find out if it worked. We’ll break it down into clear, bite-sized pieces, share the latest research, and give you practical tips to stay calm and confident along the way.
IVF isn’t just a medical process; it’s a personal one too. Everyone’s timeline varies a little, but most cycles follow a similar path. We’ll cover what happens, how long it takes, and what you can do to make it smoother. Plus, we’ll dig into details other articles might skip—like how to spot a good clinic or what new science says about success rates. Ready? Let’s get started.
What Is IVF and Why Does the Timeline Matter?
IVF is a way to help people have a baby when natural conception isn’t working. Doctors take an egg and sperm, combine them in a lab, and then place the resulting embryo into the uterus. It’s like giving nature a little nudge. The timeline matters because it’s not a one-day thing—it’s a journey that can take weeks or even months, depending on your situation. Knowing what to expect helps you plan your life, manage stress, and feel in control.
The process usually spans 4 to 6 weeks for one cycle, but prep work and follow-ups can stretch it longer. Think of it like planting a garden: you prep the soil, plant the seeds, and wait to see if they grow. Each step builds on the last, and timing is key. Let’s dive into the stages so you can see how it all fits together.
Stage 1: Getting Ready—The Pre-IVF Phase
Before the IVF cycle officially starts, there’s some groundwork to do. This pre-IVF phase can take anywhere from a few weeks to a couple of months, depending on your health and the clinic’s schedule.
Why Prep Matters
Your body needs to be in the best shape possible for IVF. Doctors check your health to make sure everything’s on track—like tuning up a car before a big race. This step also helps them create a plan just for you.
What Happens
-
- Initial Consultation: You’ll meet with a fertility specialist to talk about your medical history, goals, and any past tries at getting pregnant. This usually takes 1-2 hours.
-
- Tests and Screenings: Both partners get checked. For women, this might include blood tests (to check hormone levels) and an ultrasound (to look at your ovaries and uterus). For men, it’s usually a sperm analysis. These tests can take 1-2 weeks to complete and get results.
-
- Lifestyle Tweaks: Doctors might suggest changes like quitting smoking, cutting back on caffeine, or starting prenatal vitamins. Studies show smoking can lower IVF success rates by up to 30%, so this is a big one!
How Long It Takes
If your tests come back quickly and you’re healthy, this phase might be as short as 2-3 weeks. But if there’s a hiccup—like irregular periods or a need to lose weight—it could take 1-2 months.
Practical Tips
✔️ Ask your doctor: “What can I do now to boost my chances?” ✔️ Start a daily vitamin with folic acid—it’s good for egg health. ❌ Don’t skip the tests; they’re your roadmap.
Stage 2: Starting the Cycle—Ovarian Stimulation
Once you’re cleared, the IVF cycle begins. This is when you kick things into gear with ovarian stimulation, which lasts about 10-14 days.
What’s Going On
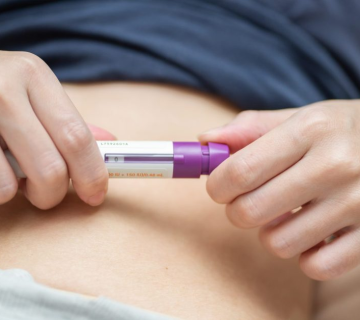
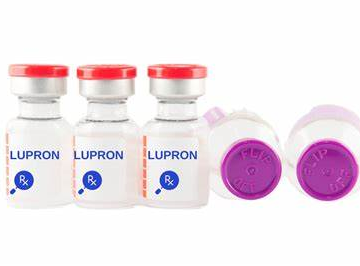
Your ovaries naturally release one egg a month, but IVF needs more. You’ll take hormone shots to help your ovaries produce multiple eggs—like giving them a pep talk to work overtime.
The Process
-
- Day 1: Your period starts—this is the official start of your cycle.
-
- Days 2-4: You begin daily hormone injections (like FSH). You’ll visit the clinic every few days for ultrasounds and blood tests to see how your eggs are growing.
-
- Days 10-14: When your eggs are ready (usually about the size of a grape, or 18-20 mm), you’ll get a “trigger shot” of hCG to help them mature.
Science Says
A 2023 study in Fertility and Sterility found that women who grew 8-15 eggs had the best balance of success and safety. Too few eggs lower your odds; too many can lead to a risky condition called ovarian hyperstimulation syndrome (OHSS).
Tips to Stay Sane
✔️ Use a calendar app to track appointments and shots. ✔️ Pair up with your partner or a friend to give injections—it’s less scary together. ❌ Don’t panic if you feel bloated; it’s normal but tell your doctor if it’s intense.
Stage 3: Egg Retrieval—Harvest Time
About 36 hours after the trigger shot, it’s time for egg retrieval. This step takes just 1 day, but it’s a big one.
How It Works
-
- You’ll go to the clinic and get light sedation (you won’t feel much).
-
- A doctor uses an ultrasound-guided needle to collect eggs from your ovaries. It takes 20-30 minutes.
-
- You’ll rest for a few hours after, then head home.
What to Expect
-
- Number of Eggs: On average, 8-15 eggs are retrieved, but it varies.
-
- Side Effects: You might feel crampy or tired. That’s normal!
Research Insight
A 2024 report from the Journal of Assisted Reproduction showed that using a new ultrasound technique increased egg retrieval success by 10%. Ask your clinic if they’re up to date on this!
Action Steps
✔️ Wear comfy clothes and bring a cozy blanket for after. ✔️ Plan a chill day—think Netflix, not errands. ❌ Don’t drive home; the sedation makes it unsafe.
Stage 4: Fertilization—The Lab Magic
While you’re resting, the lab team gets to work. This stage lasts 3-5 days and happens behind the scenes.
What Happens
-
- Sperm Meets Egg: The retrieved eggs are mixed with sperm (either your partner’s or a donor’s). Sometimes, they use ICSI (intracytoplasmic sperm injection), where one sperm is injected into an egg.
-
- Embryo Growth: Fertilized eggs grow into embryos over 3-5 days. By day 5, they’re blastocysts—ready-to-implant bundles of cells.
Success Rates
About 60-70% of eggs fertilize successfully, per the American Society for Reproductive Medicine (ASRM). Day 5 embryos have a higher implantation rate (up to 50%) than day 3 ones (around 30%).
Unique Tip
Ask your clinic about time-lapse imaging. It’s a new tech that watches embryos grow without disturbing them, and a 2023 study showed it might boost success by 5-10%.
Stage 5: Embryo Transfer—Planting the Seed
Now it’s time to put an embryo (or two) into your uterus. This happens 3-5 days after retrieval and takes about 15 minutes.
The Procedure
-
- You’ll lie down, and the doctor uses a thin tube to place the embryo through your cervix—no anesthesia needed.
-
- You might rest for a bit, then go home.
Fresh vs. Frozen
-
- Fresh Transfer: Done right after retrieval.
-
- Frozen Transfer: Embryos are frozen and transferred later (sometimes months later). A 2024 study in Human Reproduction found frozen transfers have a slightly higher success rate (45% vs. 40%) because your body gets a break.
Pro Tips
✔️ Drink water beforehand—a full bladder helps the doctor see better. ✔️ Bring a stress ball to squeeze if you’re nervous. ❌ Don’t overdo bed rest; light activity is fine unless your doctor says otherwise.
Stage 6: The Two-Week Wait—Holding Your Breath
After the transfer, you wait 10-14 days to see if the embryo sticks. This two-week wait (TWW) is the emotional rollercoaster of IVF.
What’s Happening
Your body’s gearing up to support a pregnancy—or not. You might take progesterone (pills, shots, or suppositories) to help the embryo settle in.
Feelings and Symptoms
-
- Common: Mild cramps, bloating, or sore breasts (from hormones, not always pregnancy).
-
- Tricky Part: Symptoms can mimic pregnancy or your period, so don’t overthink them.
Science Check
A 2023 study in Reproductive Biology found that stress during the TWW doesn’t directly lower success rates, but it can make the wait harder. Relaxation helps you, not the embryo.
Survival Guide
✔️ Try yoga or a funny podcast to unwind. ✔️ Make a “wait plan”—small daily treats like a coffee date or a good book. ❌ Don’t test too early; home tests can give false results before day 10.
Stage 7: Pregnancy Test—The Big Reveal
Around day 10-14 after transfer, you’ll get a blood test at the clinic to check for pregnancy. This is the moment of truth.
How It Works
-
- The test measures hCG (the pregnancy hormone). Two rising numbers a few days apart mean it’s working.
-
- If positive, you’ll have an ultrasound in 2-3 weeks to see the heartbeat.
Success Odds
Per the CDC’s 2022 data, about 35-50% of transfers lead to a pregnancy, depending on age and embryo quality. Under 35? Your odds are closer to 50%. Over 40? More like 20%.
If It Doesn’t Work
It’s tough, but not the end. Many people need 2-3 cycles. A 2024 Nature study found that tweaking the next cycle based on what went wrong boosts success by 15%.
Next Steps
✔️ Celebrate or grieve—both are okay. Talk to someone you trust. ✔️ Ask your doctor: “What can we adjust for next time?” ❌ Don’t blame yourself; biology’s tricky.
Extra Factors That Shape Your IVF Timeline
Sometimes, the basic timeline gets a detour. Here’s what might change things up.
Frozen Embryo Cycles
If you freeze embryos, you might wait weeks or months before transferring. Why? To recover from stimulation or time it with your cycle. Add 1-2 months to the timeline.
Genetic Testing
Preimplantation genetic testing (PGT) checks embryos for issues like Down syndrome. It adds 2-3 weeks while the lab analyzes them.
Donor Eggs or Sperm
Using a donor can speed things up (no stimulation for you) or slow them down (finding a match). Plan for an extra 1-3 months.
Health Hiccups
Conditions like PCOS or endometriosis might need treatment first, stretching prep time by 1-6 months.
A Sample IVF Timeline Table
Here’s a quick look at a typical cycle:
| Stage | Timeframe | What Happens |
|---|---|---|
| Pre-IVF Prep | 2 weeks – 2 months | Tests, consults, lifestyle fixes |
| Ovarian Stimulation | 10-14 days | Hormone shots, egg growth |
| Egg Retrieval | 1 day | Eggs collected |
| Fertilization | 3-5 days | Eggs + sperm = embryos |
| Embryo Transfer | 1 day | Embryo placed in uterus |
| Two-Week Wait | 10-14 days | Waiting for pregnancy test |
| Pregnancy Test | 1 day | Blood test for hCG |
Total: 4-6 weeks (plus prep).
Unique Insights: What Others Miss
Most IVF guides stop at the basics, but let’s go deeper with stuff you won’t find everywhere.
The Role of Sleep
A 2024 study in Sleep Medicine found that women getting 7-8 hours of sleep during IVF had a 12% higher success rate. Why? Sleep balances hormones like cortisol, which affect egg quality. Tip: Set a bedtime alarm!
Clinic Quality Counts
Not all clinics are equal. The CDC tracks success rates—check their 2022 report online. A top clinic might hit 60% success for under-35s, while a weaker one’s at 30%. Ask: “What’s your live birth rate for my age?”
New Tech: AI in IVF
Some clinics now use AI to pick the best embryos. A 2023 trial showed it improved selection accuracy by 20%. It’s not everywhere yet, but worth asking about.
Your IVF Checklist: Be Ready
Here’s a handy list to keep you on track:
-
- ✔️ Pick a clinic with good reviews and stats.
-
- ✔️ Get your tests done early—don’t delay.
-
- ✔️ Stock up on healthy snacks for stimulation days.
-
- ✔️ Plan time off for retrieval and transfer.
-
- ✔️ Find a support buddy—partner, friend, or group.
-
- ❌ Don’t skip meds or appointments; timing’s everything.
-
- ❌ Don’t Google every symptom in the TWW—it’s a rabbit hole.
FAQs: Your Top IVF Timeline Questions Answered
Q: How long does IVF take from start to finish?
A: One cycle is 4-6 weeks, but prep and repeats can make it 2-6 months total.
Q: Can I speed it up?
A: Not really—biology sets the pace. But starting prep now saves time later.
Q: What if I’m over 40?
A: Your timeline’s the same, but success might take more cycles. Donor eggs could shorten it.
Q: Does stress mess it up?
A: Not directly, but it makes it harder to cope. Chill tactics help.
Let’s Talk: Your IVF Story
The IVF timeline can feel like a marathon, not a sprint. But with the right info, you’re not running blind. What about you? Are you just starting, in the thick of it, or looking back? Share your thoughts below—what’s been the toughest part, or what’s kept you going? Your story might help someone else feel less alone. Let’s keep this conversation going!


No comment