
IVF Steps and Timeline: What to Expect
If you’re considering IVF (in vitro fertilization) as a way to grow your family, the process may seem overwhelming. The steps involved can be complex, but understanding the IVF timeline and what to expect along the way can help ease your anxiety and prepare you for the journey ahead. In this article, we’ll walk you through the IVF process, breaking down each step and providing a clear overview of the typical IVF timeline.
Step 1: Initial Consultation and Testing
The first step in the IVF process is your initial consultation with a fertility specialist. This is where your doctor will review your medical history, discuss your fertility challenges, and help determine if IVF is the best treatment option for you.
During this consultation, your doctor will likely recommend several tests, including blood work to check hormone levels, an ultrasound to assess your ovaries and uterus, and possibly a semen analysis for your partner. These tests help create a personalized treatment plan tailored to your specific needs.
Dr. Emily Richards, a fertility specialist, explains: “The initial consultation is essential to ensure we understand the underlying causes of infertility. It helps us to develop a plan that maximizes the chances of success.”
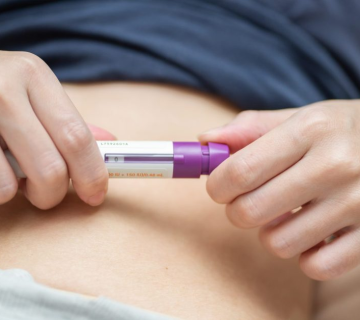
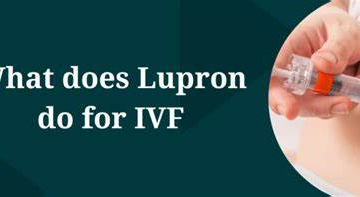
Step 2: Ovarian Stimulation
Once you’ve decided to move forward with IVF, the next step is ovarian stimulation. This is the phase where medications are used to stimulate the ovaries to produce multiple eggs, rather than the single egg that is typically released each month.
You’ll begin taking hormone injections, usually starting on day 2 or 3 of your menstrual cycle. These injections contain follicle-stimulating hormone (FSH) or luteinizing hormone (LH), which encourage your ovaries to produce more eggs.
During this time, you’ll visit your clinic regularly for blood tests and ultrasounds to monitor how your ovaries are responding to the medications. Your doctor will adjust the medication doses if necessary to ensure that the eggs are developing properly.
Dr. Richards notes, “The goal during this phase is to get a good number of mature eggs ready for retrieval, but it’s important to balance stimulating the ovaries without overstimulating them.”
Step 3: Egg Retrieval
Once your eggs are ready, the next step is egg retrieval. This is a short, outpatient procedure performed under sedation. The doctor will use an ultrasound-guided needle to collect the eggs from your ovaries. This step is typically done in a hospital or clinic setting, and you’ll be sedated to ensure comfort.
The procedure usually takes about 20-30 minutes, and you may experience some cramping afterward. Recovery time is generally short, and you can go home the same day.
After egg retrieval, your eggs will be sent to the laboratory, where they will be fertilized with sperm, either from your partner or a donor, depending on your situation.
Step 4: Fertilization and Embryo Culture
In the lab, the eggs are fertilized using one of two methods:
- Conventional IVF: Sperm is placed in a dish with the eggs, and fertilization occurs naturally.
- ICSI (Intracytoplasmic Sperm Injection): A single sperm is directly injected into an egg to facilitate fertilization, often used in cases of male infertility.
After fertilization, the embryos are monitored for growth. Over the next few days, the embryos will develop, and your doctor will decide the best time to transfer them.
This phase typically lasts about 3-5 days, and the embryos are watched closely for signs of healthy development. The embryos that are most likely to lead to a successful pregnancy are selected for transfer.
Step 5: Embryo Transfer
Embryo transfer is a relatively simple, non-surgical procedure where one or more healthy embryos are placed into your uterus. This step takes place a few days after fertilization, typically on day 3, 5, or 6, depending on the development of the embryos.
The transfer is done using a thin tube (catheter) that is inserted through the cervix into the uterus. There is no anesthesia required, although you may experience some mild discomfort. Most patients are able to return to normal activities immediately after the procedure.
Dr. Daniel Katz, a fertility specialist, says, “Embryo transfer is a delicate procedure, but it’s relatively painless and quick. It’s the moment when you can feel like you’re one step closer to becoming a parent.”
Step 6: Waiting Period and Pregnancy Test
After embryo transfer, you’ll enter the “two-week wait.” During this time, your body needs to prepare for implantation, and it can be a nerve-wracking experience. You’ll be instructed to take it easy and avoid heavy physical activity during this period.
Around 10-14 days after the embryo transfer, you’ll return to the clinic for a blood test to check for pregnancy. This test measures the level of human chorionic gonadotropin (hCG), a hormone that rises when an embryo implants in the uterus.
It’s important to remember that many women experience mild spotting or cramping during the wait, which is normal and does not necessarily mean that the IVF cycle has failed.
Dr. Katz explains, “The two-week wait can be an emotional rollercoaster. It’s essential to remain patient and stay positive, but it’s also important to have support from loved ones during this time.”
Step 7: Pregnancy Confirmation and Next Steps
If the pregnancy test is positive, congratulations! You’ll be asked to return to the clinic for a follow-up blood test to confirm the pregnancy and monitor hCG levels. You may also undergo an ultrasound after a few weeks to check for a heartbeat and confirm the viability of the pregnancy.
If the test is negative, don’t be discouraged. IVF can take several attempts, and many patients find success after multiple cycles. Your doctor will review the results with you and suggest any adjustments for future attempts, such as changing the medication protocol or considering additional genetic testing.
IVF Timeline Summary
- Initial Consultation and Testing: 1-2 weeks
- Ovarian Stimulation: 10-14 days
- Egg Retrieval: 1 day (typically under sedation)
- Fertilization and Embryo Culture: 3-5 days
- Embryo Transfer: 1 day
- Waiting Period: 10-14 days
- Pregnancy Test and Follow-Up: 1-2 weeks
The IVF process, from start to finish, typically takes about 4-6 weeks, with an additional 2-4 weeks of waiting for the pregnancy test results. If a second cycle is needed, it may be scheduled a few months later to allow your body to recover and prepare for the next attempt.
Conclusion
IVF is a complex but rewarding journey that involves multiple steps, each requiring careful planning and monitoring. Understanding the steps and timeline involved can help reduce anxiety and allow you to be better prepared for the emotional and physical aspects of the process.
As Dr. Richards puts it, “While IVF can be challenging, it’s also one of the most effective ways to overcome infertility. With the right support and guidance, it’s a journey that can lead to the joy of parenthood.”
By being informed and prepared, you can navigate the IVF process with confidence, knowing that each step brings you closer to achieving your dream of becoming a parent.

No comment